Building a Low-power Ryzen HTPC, Part I
Posted on 2022-01-15
It’s a little embarrassing, really. I’ve used computers in various shapes and forms since I was 7, yet I’ve never built one. Given I had some free time and a a bit of cash on the side, I decided to build a home HTPC / NAS.
Not that I needed one – so far I’ve been using a RPi 2 running Kodi for my HTPC needs. I had plugged a 2 TB portable HDD into the Pi to serve as data storage and backup. Sure, it was lacking in speed and data redundancy, but it was good enough for me. I also ran a Pihole instance there. What bothered me about the Pi was that its SD card had a habit of giving out. It had died on me a couple of times already, and I, being a lazy person, had to set up everything from scratch each time, rather than restoring root and boot partitions from backup.
Again, not that I really needed a new HTPC. But my birthday was also closing in back when I was making the decision. ¯\_(ツ)_/¯
No point in trying to feel better about splurging, so here’s a list of my requirements:
Since the HTPC was going to be in my living room, it has got to be silent. My wife was pretty adamant on this. It should be silent enough to be indistinguishable from ambient noise while playing media (easy) and idling (a bit harder).
It needs to run as efficiently as possible, so low power usage is a must. I did decide to replace a ~5W RPi with a full-fledged PC. I did not have a specific target at that time, but I knew laptop chargers deliver ~100W, so anything lower than that would be fine. Much lower than that when idling.
It needs to be able to do 4K @ 60fps, meaning HDMI 2.0 at least. This is supposed to be an upgrade over RPi. The fact that I don’t own a 4K TV doesn’t matter right now. Non pertinent. Irrelevant.
Small form factor that fits in my Fjällbo TV unit. This translates to mini-ITX motherboards, and very small cases.
Better data redundancy. I’ve always wanted to build a RAID setup. I don’t even need a lot of space, 1 TB would be more than enough. This will serve for cold storage mostly, so HDDs running at 5400 RPM are just fine - more silent and less power hungry than 7200 RPM drives.
Fast startup time and responsive OS. This requires an SSD drive for root and boot partitions.
As far as everything else goes, optimize for lower price first, upgradability second. I was aware of the global chip shortage back in October 2021, but I kinda thought that I was going for a niche build and that availability of components I needed wouldn’t be affected as severely as things that are in high demand, such as GPUs. Boy, I was wrong. It turns out I had to prioritize market availability first, and then everything else.
Bill of materials
Shipping not included:
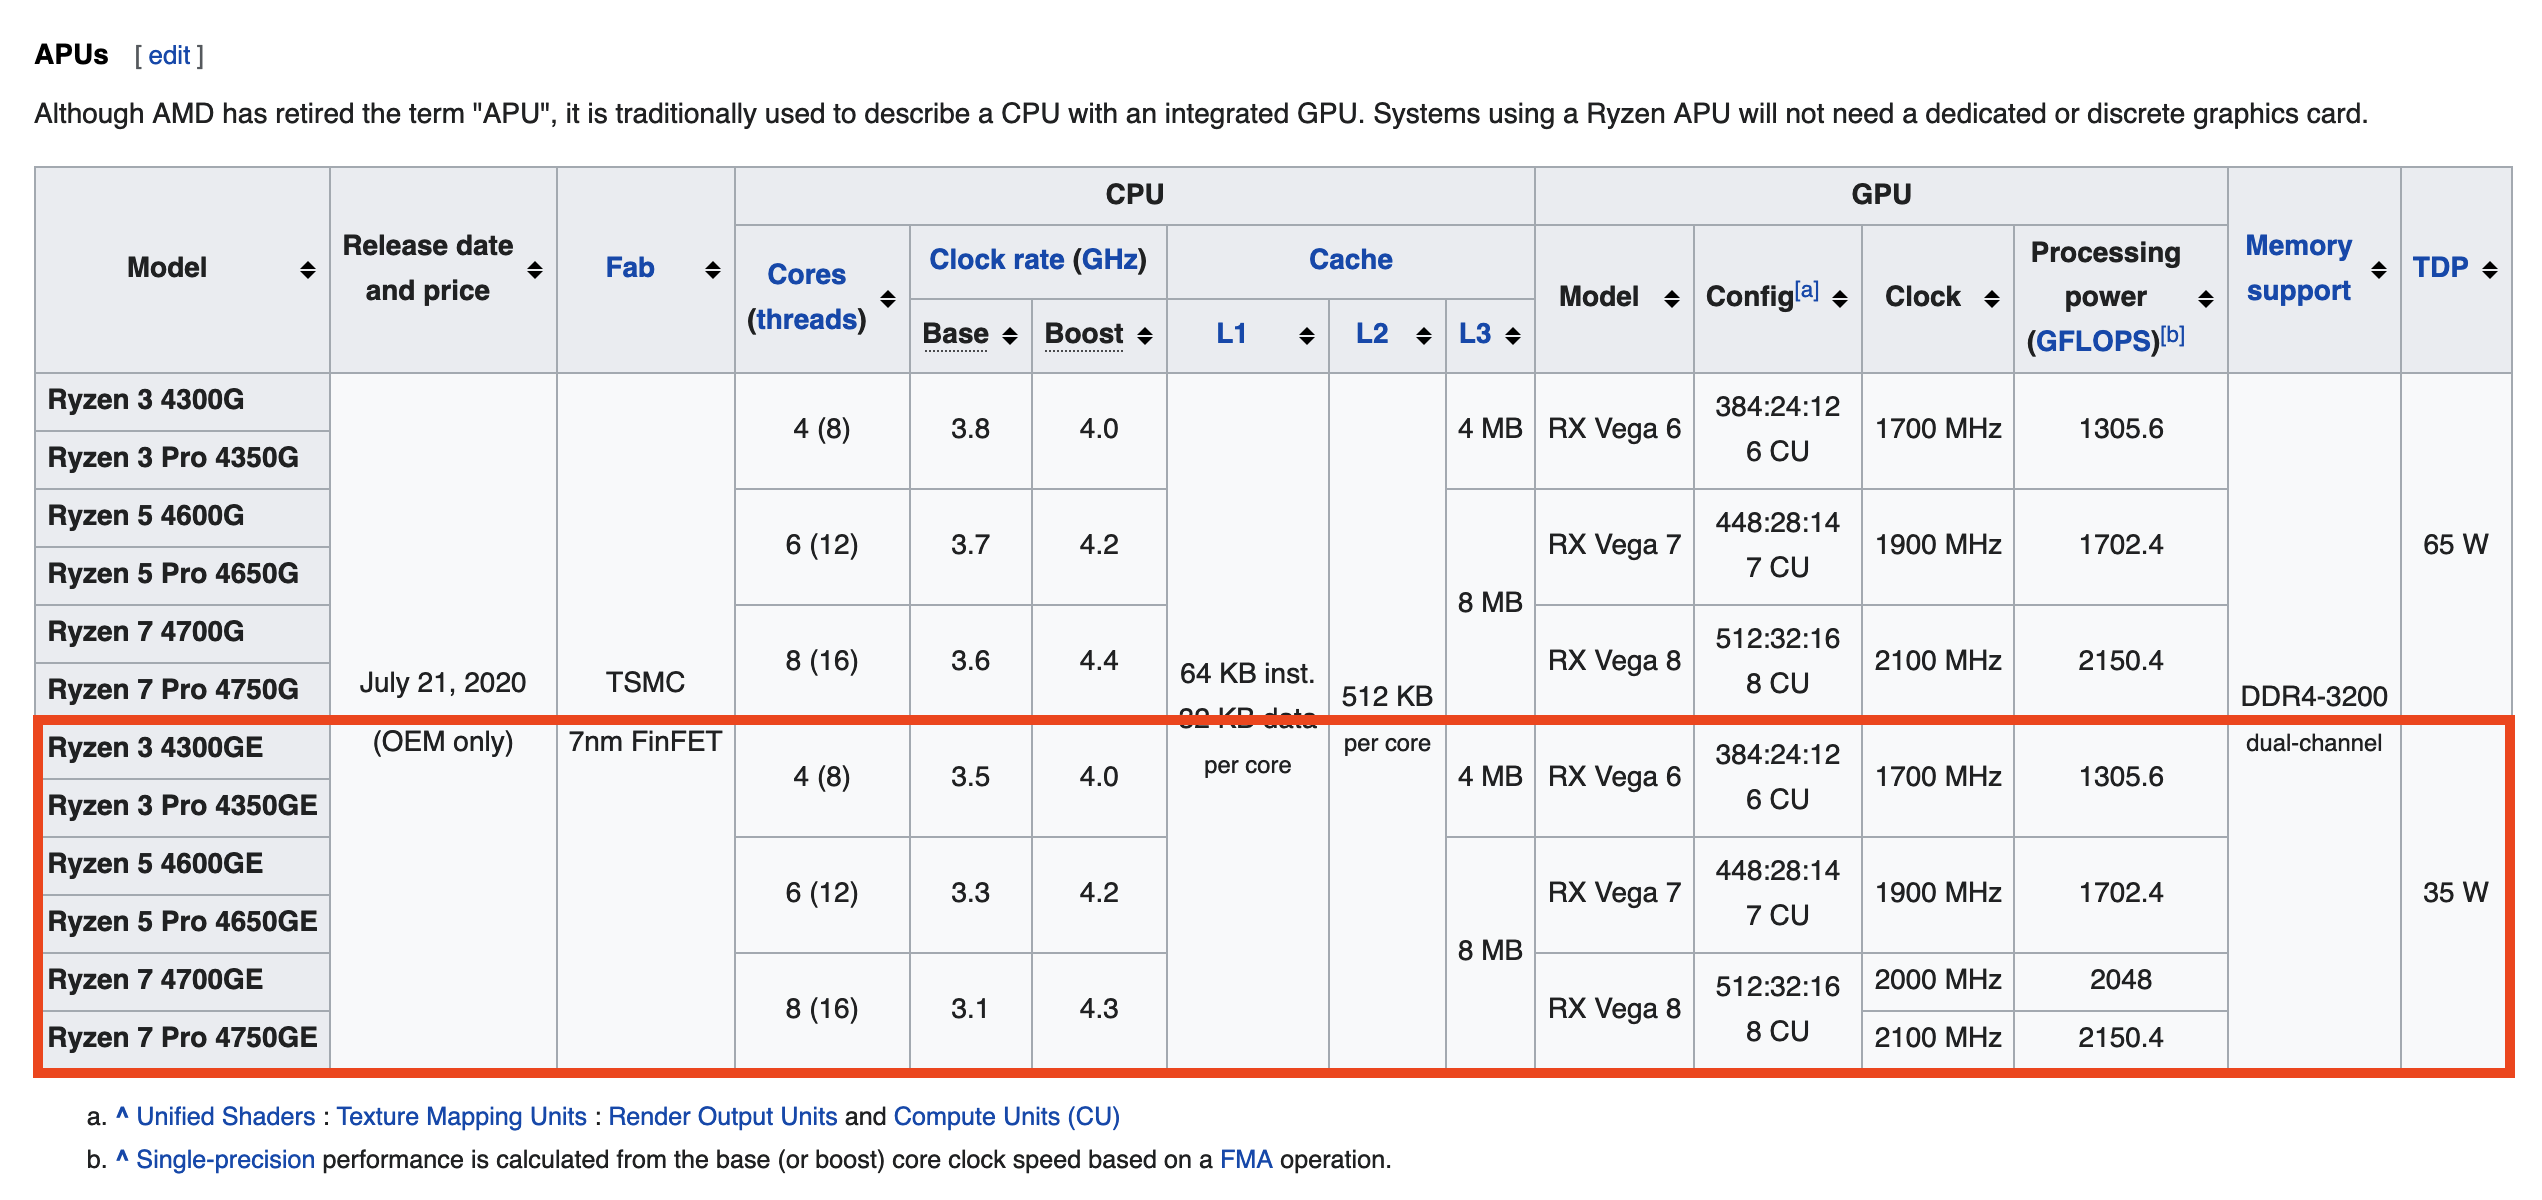
CPU:     Ryzen 3 4300GE (OEM)                    x 1 = 220 EUR
Cooler:  ID-Cooling IS-30                        x 1 =  39 EUR
Board:   ASRock Fatal1ty B450 Gaming-ITX/ac      x 1 =  98 EUR
Case:    Chieftec IX-03B-OP                      x 1 =  34 EUR
PSU:     Chieftec CDP-085ITX                     x 1 =  47 EUR
RAM:     HyperX Fury 8GB 3200Mhz HX432C16FB3K2/8 x 1 =  72 EUR
SSD:     Gigabyte 256GB NVMe GSM2NE3256GNTD      x 1 =  39 EUR
HDD:     WD Blue 1TB 2.5" 5400rpm WD10SPZX       x 2 =  98 EUR
--------------------------------------------------------------
                                               total = 647 EUR
Let’s dive in specific parts, starting with the CPU.
The CPU
My first choice was going to be a low TDP, integrated CPU with passive cooling: Intel Celeron J4005, or any newer variant up to and including Intel Pentium Silver J5040. All of these CPUs are declared at 10W TDP, which is pretty darn good. The obvious motherboard choice was Gigabyte J4005N D2P, which is one awesome board that comes with 2 SATA III connectors and an M.2 connector for PCIe x2 SSDs (at ~1000 MB/s this is still an order of magnitude faster than any hard drive).
Unfortunately, due to the chip shortage, these boards cannot be found anywhere. I also looked for similar ASRock mobos such as J4005-ITX and J5040-ITX, that are inferior to the Gigabyte board as they lack the M.2 connector, but I had no luck with those either.
At that point it dawned on me that I could probably get a pretty low idle power usage from new Ryzen CPUs, given that some of them are declared at 35W TDP. These CPUs are more expensive, more noisy because they need active cooling, and getting one meant I would have to purchase a separate motherboard. On the other hand, you could actually find some Ryzen Zen 2 CPUs on the market (Zen 3 had not hit the market yet at that point), and any Ryzen CPU is going to be far more powerful than any Intel CPU I was looking at.
So I picked the cheapest Zen 2 Ryzen CPU (APU, actually) that I could find: Ryzen 3 4300GE. It’s OEM only, meaning that, unlike retail CPUs, it doesn’t come in a box and usually comes without a stock cooler. Luckily, I was able to find one at Ebay, and the seller also shipped a stock cooler1 with it. Neat!
The Board
Okay, now I needed to find a mini-ITX AM4 motherboard. Many choices tick all the boxes there, so I opted for one that looked pretty: ASRock Fatal1ty B450 Gaming-ITX/ac. Up to 64 GB of DDR4 RAM, four SATA III connectors, one M.2 connector (PCIe x4 in this case), HDMI 2.0, 1Gbps Ethernet, integrated WLAN and Bluetooth (might come in handy for controllers/keyboards). The whole kit and caboodle at a reasonable price, and plenty of expansion options for the future.
The Case and the Fan
Now this was a tough choice, mostly because of size restrictions. At first I was trying to find a silent, fanless case, such as Akasa Maxwell Pro, which has an interesting heat sink design that fully replaces CPU fan. Very expensive, though. However, after reading about silent fans, especially Noctua L9a, I figured that I could live with a tiny bit of noise traded for better thermal performance.
I looked for Antec ISK 310-150, but I couldn’t find it on the market. Then I started looking at LC Power cases, such as LC-1540mi and LC-1530mi, and, again, no luck. Fractal Node 202 came up as an option, but a) it is a bit on the expensive side, b) it barely fits in my TV unit and is much bigger than other cases, c) has a GPU compartment which would be completely empty.
Finally, I settled with what I could find: Chieftec IX-03B-OP. Truth be told, I like this spartan, no-nonsense design. No ports on the front or the sides, a very simple LED blue/red circle indicator for Power/HDD on the front. However, it was immediately clear to me that what I had would barely fit inside. Tiny cases like these don’t have room for a full PSU unit, not even SFX PSU. They rely on picoPSU DC-DC units2 that are usually coupled with an external, fanless AC/DC converter. I opted for Chieftec 85W power supply that often comes with the case itself: CDP-085ITX.
At this point I made a screw-up: within this tiny case, 2.5” drives are mounted above the CPU fan. This leaves enough room only for CPU fans with height up to 30mm! Noctua L9a stands at 37mm tall, so that was no longer an option. The only 30mm fan I could find was the ID-Cooling IS-30. Specs say that it can be used on CPUs up to 100W TDP, so my guess was that it would be more than enough.
I won’t talk about the rest of the components, because it’s pretty standard, off-the-shelf stuff.
The Assembly
I’m not good with my hands. I really hate doing any kind of precision work that involves complex hand and finger movement, like fidgeting with small things. Especially if I’m doing something for the first time, even more so if I can break or damage something.
Luckily, my wife bridges this gap. I was taking care of the order of putting things together and where each thing goes, while she was carefully working on the actual assembly.
A couple of notes:
We couldn’t find a way to affix the DC-DC PSU board. This is strange given that it is the recommended PSU that goes with the case. But try as we might, there was no way we could screw it to the back of the front side of the case, where it was supposed to go. In the end, tautness of power connector cables was sufficient to hold it pinned against the front side of the case. I placed a bit of packaging foam underneath the DC-DC board to keep it in place and make it a bit more stable, and left it at that.
Cable management was a pain. Even with zip ties, there’s so little room and so little manoeuvring space when everything is crammed inside the case. I wish I could get rid of extra power connectors that I did not use (a molex and a SATA connector), but I did not want to risk damaging isolation on the cables that I do use. Additionally, SATA data cables that I purchased are 0.5m long, whereas I only need about 10cm. This slack makes things even worse.
A couple of words on thermals: there is only a few millimeters of space between the bottom of HDD drives and the top of the CPU fan (which is, by the way, the only fan in the case). This looked like it would hurt the thermals, but I haven’t really tested the limits of the CPU yet. The way I use it – underclocked at 2000Mhz and undervolted at 0.95V – it never goes over 65 degrees Celsius during stress tests, and is at about 42 degrees C when idling.
When we assembled the PC the first time, I was not able to boot it. The fan would spin up, but there was no video output, and the PC would restart after ~10 seconds. At that point I realized I had no debugging capabilities whatsoever. In hindsight, a better approach would have been to start out with the most basic components, boot it up, and gradually add other components until everything is installed, and then finally clean up the cables and close up the case. In the end, it turned out to be a stupid thing: I pulled out RAM modules, cleared the CMOS and reinstalled the modules, and it booted without issues! No idea what went wrong there.
Some obligatory before and after photos:
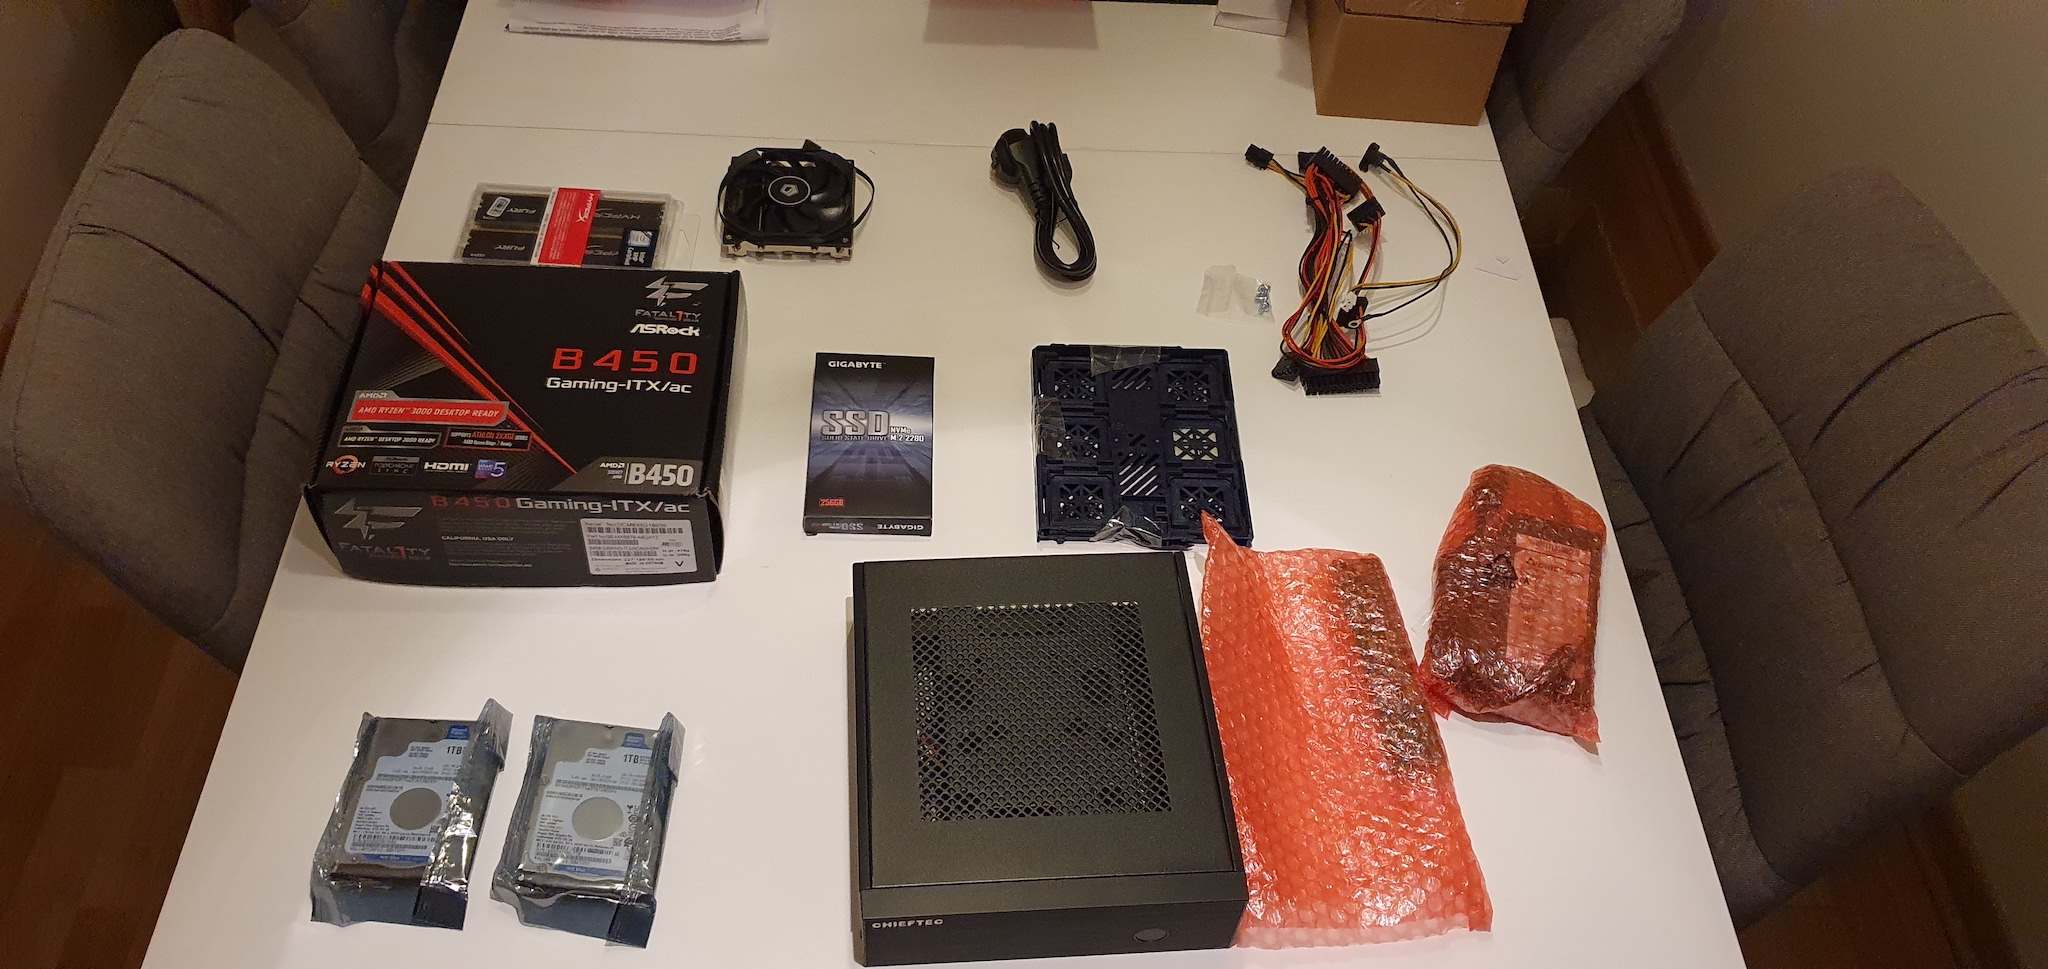
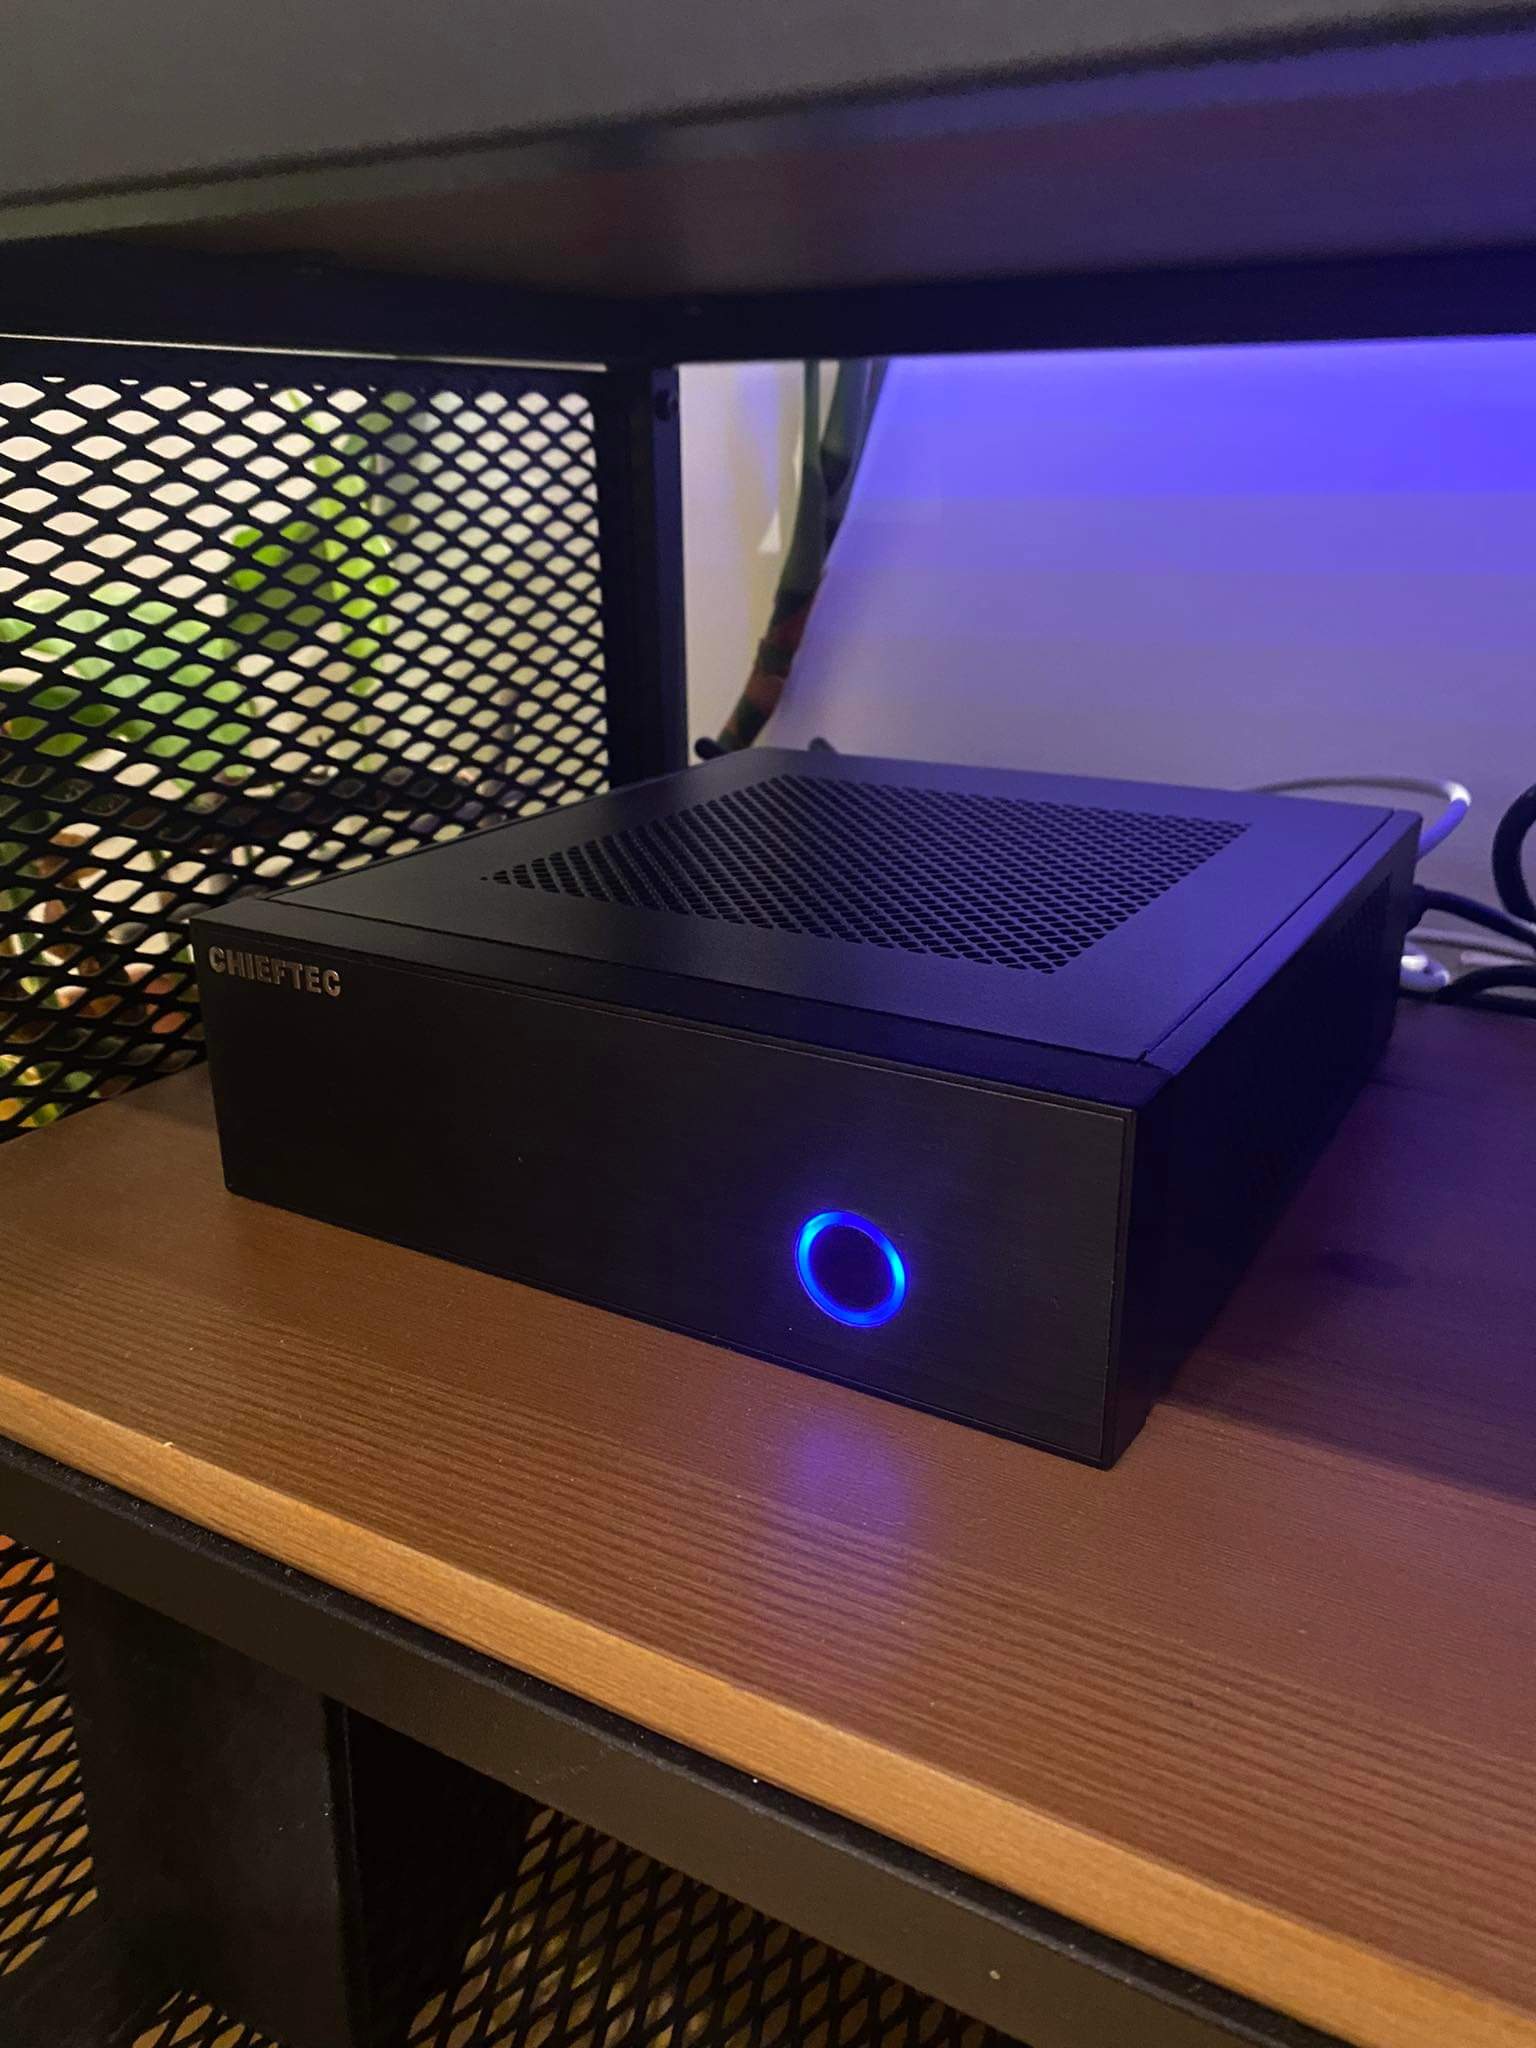
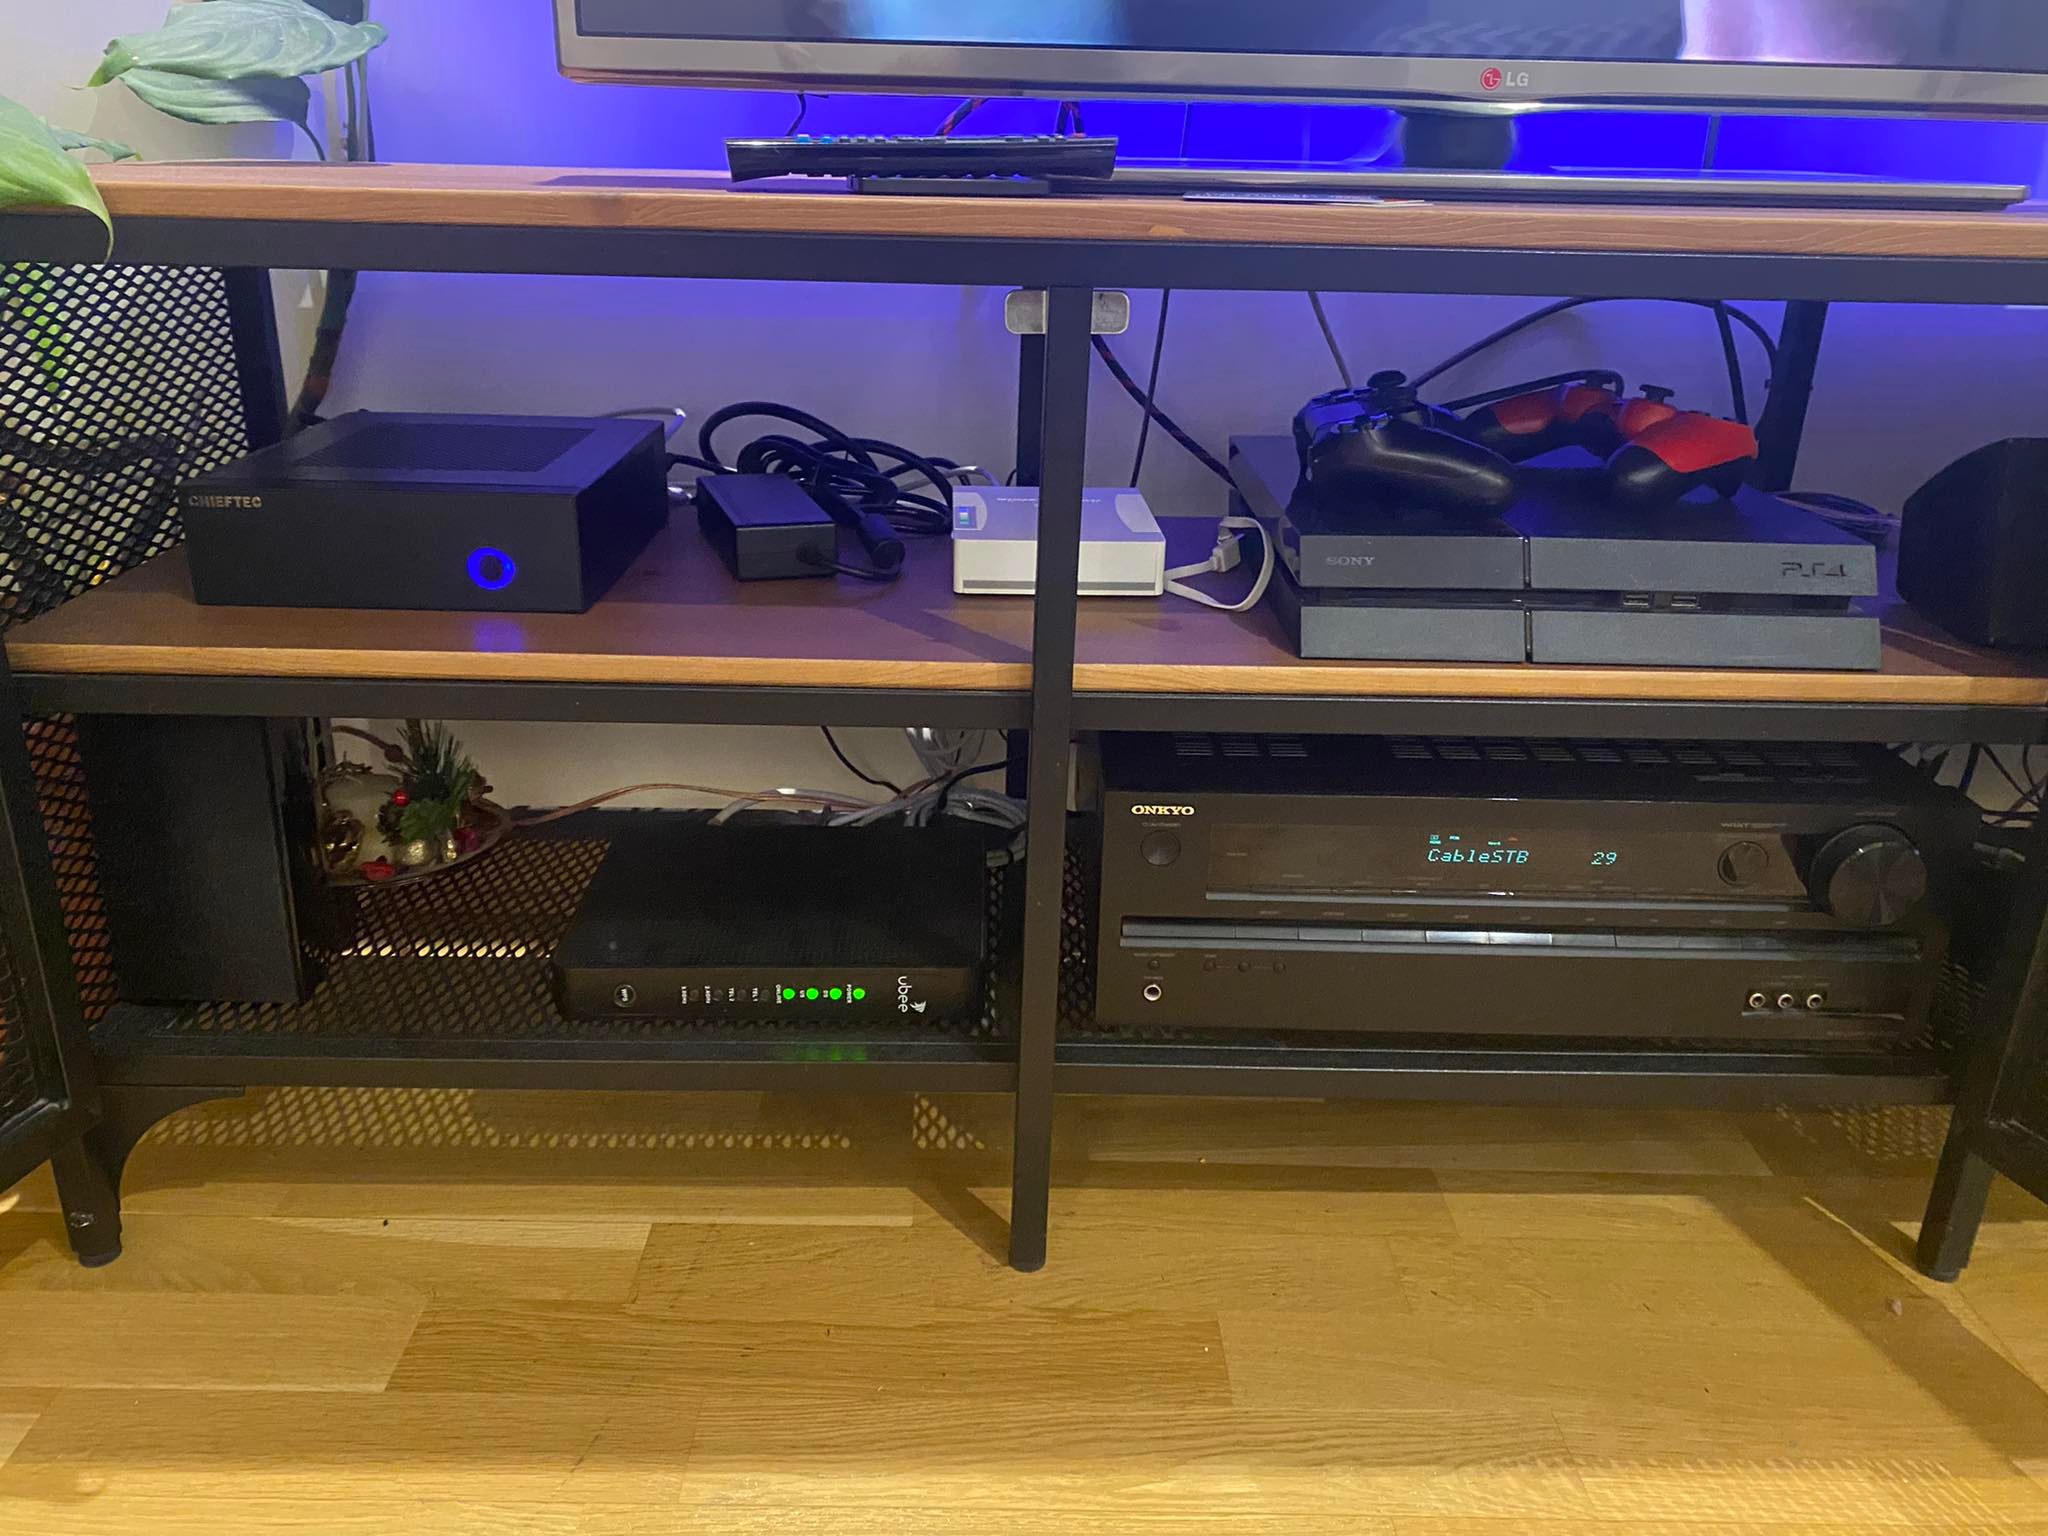
I have to say, I’m pretty happy with how everything turned out. It’s quite impressive what you can fit in such a small package nowadays.
In the second part, I’ll cover underclocking, fan noise, system setup and power consumption.
In the end, I did not use the stock cooler at all because it wouldn’t fit in the case. Besides, it would be too loud.↩︎
It’s important to check if picoPSU comes with power connectors that you actually need. This one comes with 3 SATA connectors, a molex, a 4-pin CPU fan, a standard 20+4 ATX and a 4-pin CPU connector. I haven’t checked this before I started assembling the PC: my motherboard has a 8-pin CPU power header, but luckily you are allowed to connect the 4-pin connector to the top part of the 8-pin header, and everything will be fine.↩︎